To use a mini microphone with an iPhone, it is essential that you pick the right type. A suitable microphone is the one that seamlessly connects to your iPhone. That is why it should be compatible with your device. However, many people are unaware of the criteria to select a mini mic. Also, they have inadequate knowledge about using tiny microphones.
So, in this article, you will learn the different types of mini microphones and ways to use them with your iPhone. You will also explore the top 3 mini microphone brands. By the end of this article, you will get answers to some of the most puzzling questions related to miniature microphones and iPhone models.
What Types of Mini Microphones Can I Connect to My iPhone?
There are different types of microphones you can use with your iPhone. However, compatibility depends on your iPhone model. Older iPhone versions have different connectors compared to the later and newer models. For instance, all models before the iPhone 5 series have a 3.5mm jack. From iPhone 5 to iPhone 14 Pro Max, the phones come with a lightning port. In contrast, the latest iPhone 15 series has a USB-C port. So, keeping these points in mind, the types of mini microphones you can seamlessly connect to your iPhone are:
a. Wired Lavalier / Lapel Microphone
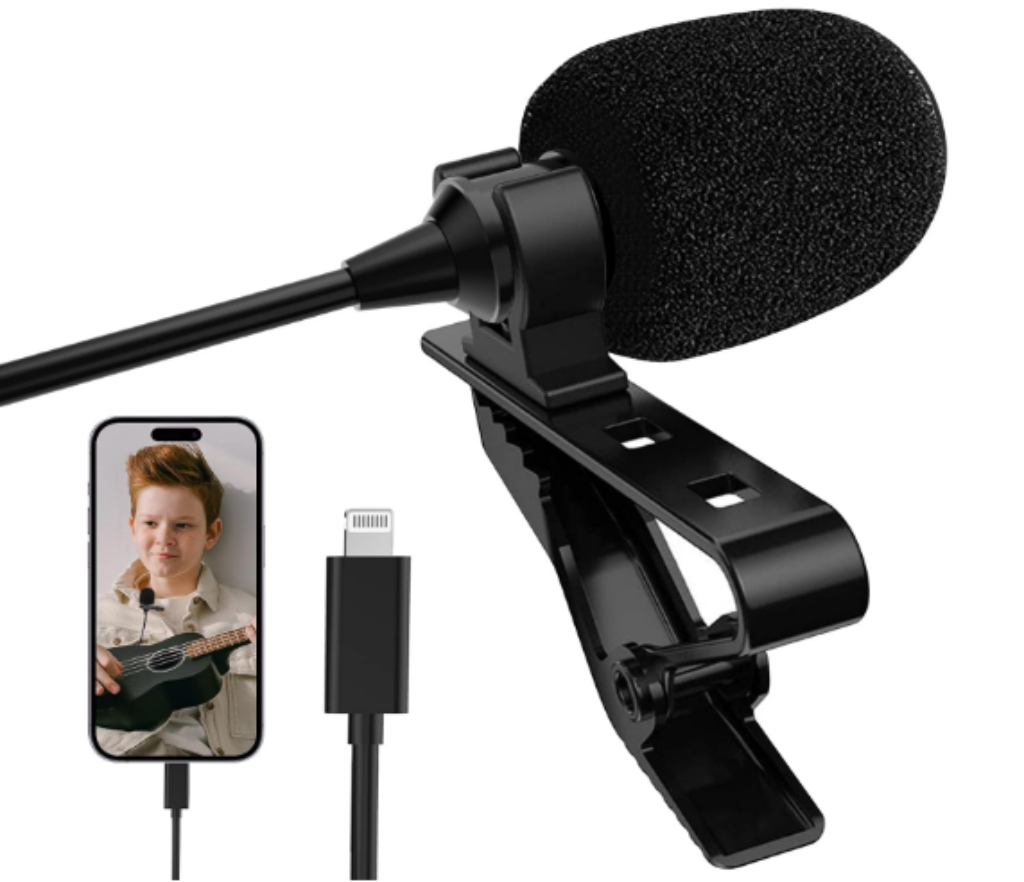
A wired lavalier microphone is one of the most popular and renowned options for your iPhone. These are usually miniature mics designed to clip onto your shirt. They provide good sound quality and hands-free operation. You can use them for various applications, including vlogging, interviews, and presentations.
Lavalier mics generally have a 3.5mm jack, making them compatible with older iPhone models. However, you can also use them with iPhones with a lightning port using a lightning to 3.5mm adapter. The Sony ECM-LV1 is one the prime examples of wired lavalier mini microphones. On the other hand, some brands like GALVANOX have a lightning port with a cable.
Also, wired microphones use the iPhone’s power to stay functional. So, if cables don’t bother you, a mini wired lapel microphone can be a suitable option for your iPhone.
b. Wireless Mini Microphones (with USB / Lightning Connectors)
A wireless microphone is the most convenient recording solution for iPhone. These microphones use two major technologies -2.4GHz digital transmission or Bluetooth – to transmit signals from a few meters to several hundred feet, depending on your chosen brand and model.
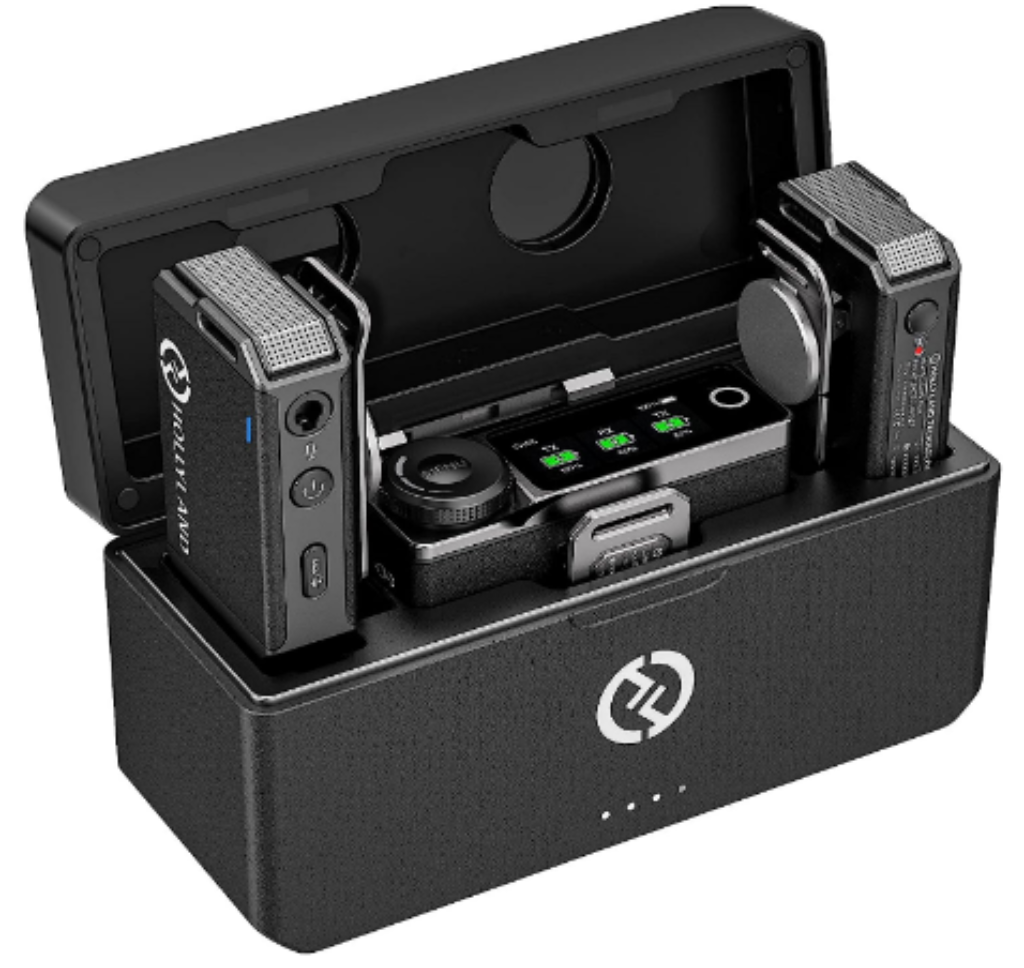
Wireless mini microphones for iPhones have three main units – transmitter, receiver, and case. The transmitter acts as a microphone and the receiver connects to the iPhone port. Each transmitter (TX) pairs with its dedicated receiver (RX) to send audio signals wirelessly, allowing you to record audio on your device. The case acts as a storage and charging hub for the TX and RX. Wireless mini microphones require the recharging of batteries for smooth functionality.
Some wireless microphone companies release the same model with different numbers of transmitters. For instance, normally a wireless microphone kit comes with 2x TX and 1x RX for 2-person recording. But you may also find the solo version of the same model with 1x TX.
Likewise, wireless mini mics have the same model in different RX variants. That means, you may find the same model of the mini mic in USB-C, lightning, or 3.5mm jack connectors. This convenience makes it possible for almost all iPhone users to savor the perks of a wireless microphone and record high-quality audio effortlessly.
c. Mini Shotgun Microphones
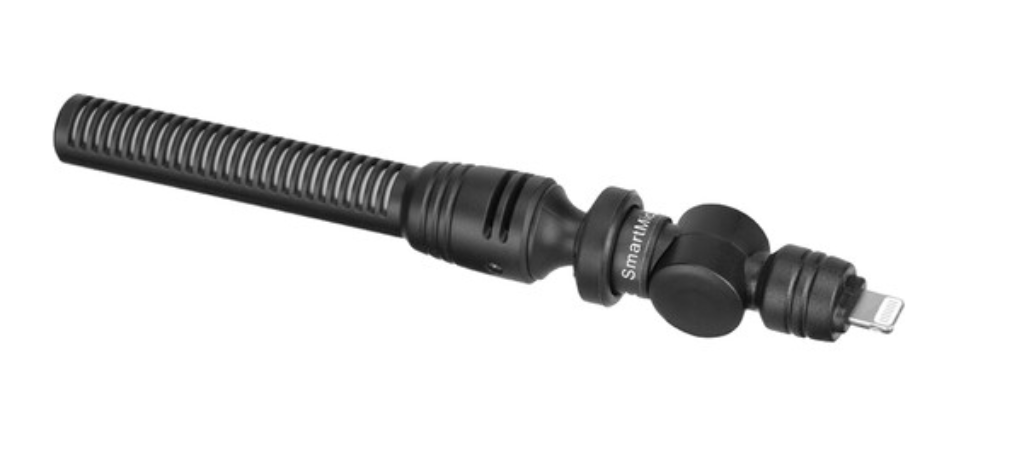
Shotgun microphones also come in miniature designs. They are great for capturing audio from a specific direction, as they are manufactured to pick up sound, usually from the front side of the mic. This helps mitigate background noises and lets you record clear sounds from short distances.
The majority of mini shotgun microphones have a lightning connector instilled within their structure. You can connect them directly to your iPhone via a lightning port like the Saramonic SmartMic 5 Di. Similar to wired mics, shotgun microphones use your iPhone’s battery to stay functional.
How to Use Mini Microphone with Your iPhone?
Whether you have a mini wireless, wired, or shotgun microphone for your iPhone, you have to follow a few steps to start recording audio with clarity. Assuming you already have a recording app for your external mic, such as Ferrite Recording Studio, here’s what you should do.
1. Check Compatibility
To make sure there is compatibility between your iPhone model and mini microphone.
Find out the connector/port your iPhone has. The Rode Lavalier Go (wired) microphone is used with iPhone 10 to make this process easy to understand. Since this mini mic has a different connector (TRS) than the iPhone 10’s port (lightning), you will need to have the following adapters:
- TRS to TRRSadapter
- TRRS to Lightning adapter
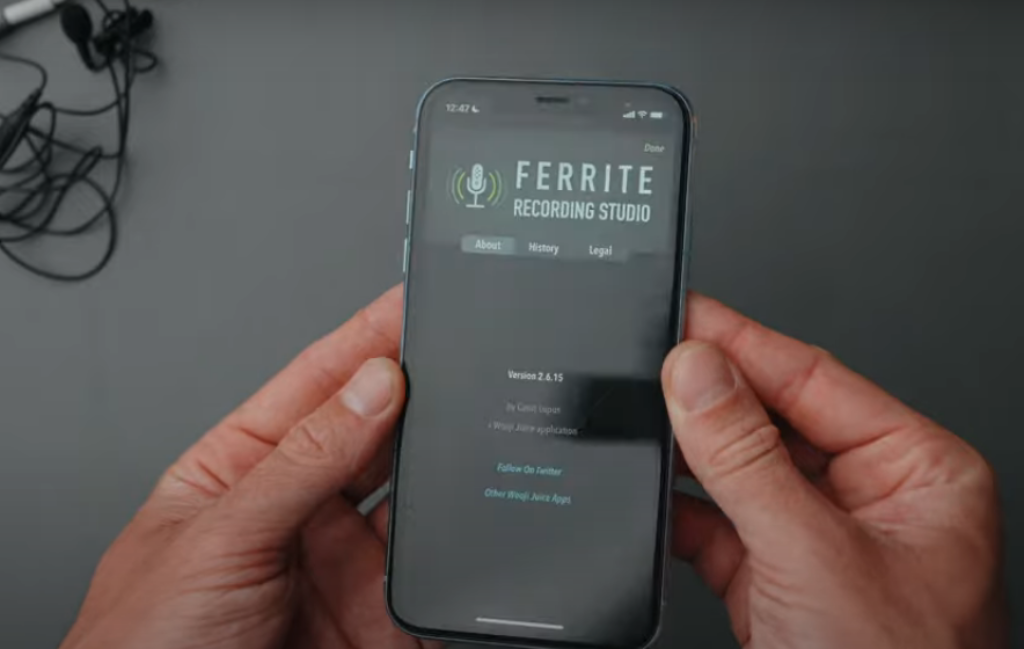
Moreover, Ferrite Recording Studio is used as a primary audio recording application.
But, remember, the newer models of the iPhone mostly feature lightning and USB-C ports. But the older models come with a headphone jack. So, get a mini microphone that matches your iPhone’s port.
Next, ensure your mini microphone is compatible with the operating system. Some microphones may require the latest iOS version to run smoothly on your device. To check whether the mic supports your iOS, visit the manufacturer’s website and read product specifications.
And while you’re overviewing the specs, check if your desired mini microphone has an MFi certification. The “Made for iPhone” certification ensures the microphone meets Apple’s standards.
2. Connect Your Mini Microphone
In order to connect your miniature mic to your iPhone, locate the USB-C or lightning port correctly. You can see the bottom area of the phone to see the port. In some cases, your microphone and iPhone may have different connectors/ports. In such scenarios, you may need an adapter to connect the mic. So, In this step, you will learn how to connect the Rode Lavalier Go microphone to your iPhone 10.
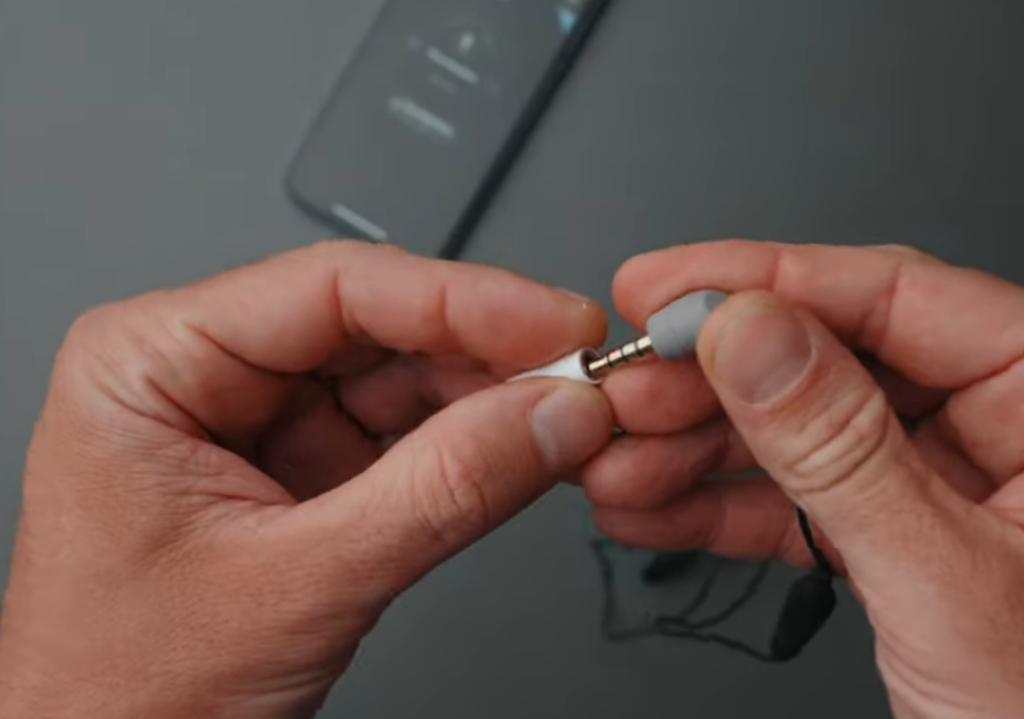
- Step 1: Insert the Rode mini microphone headphone jack into the TRS to TRRS adapter.
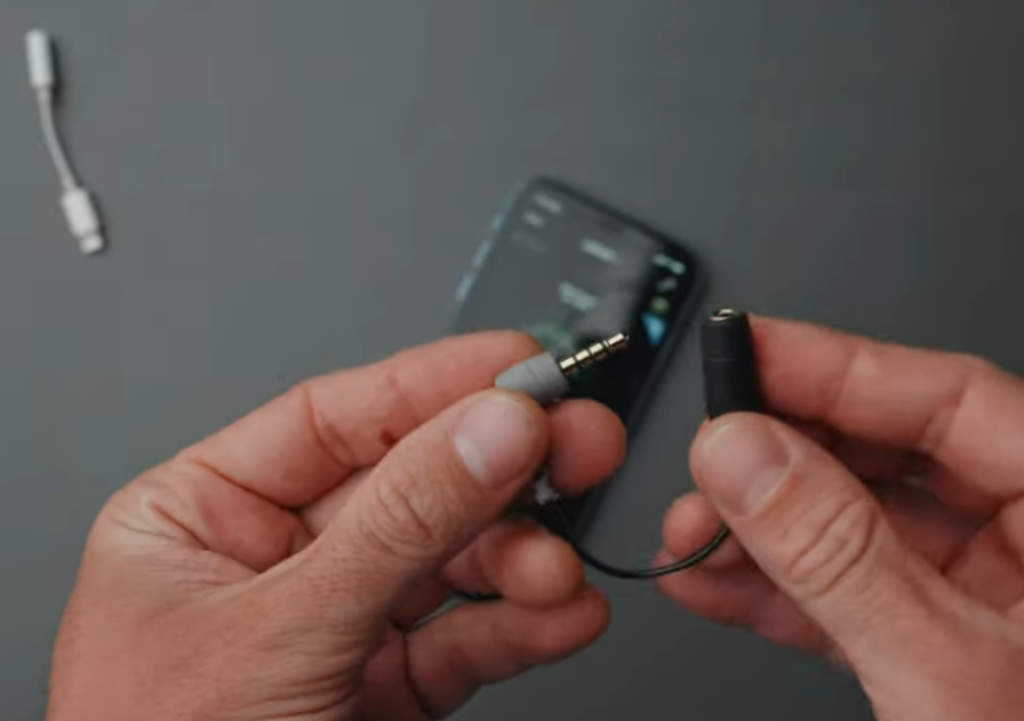
- Step 2: Now, connect the TRRS adapter to the lightning adapter.
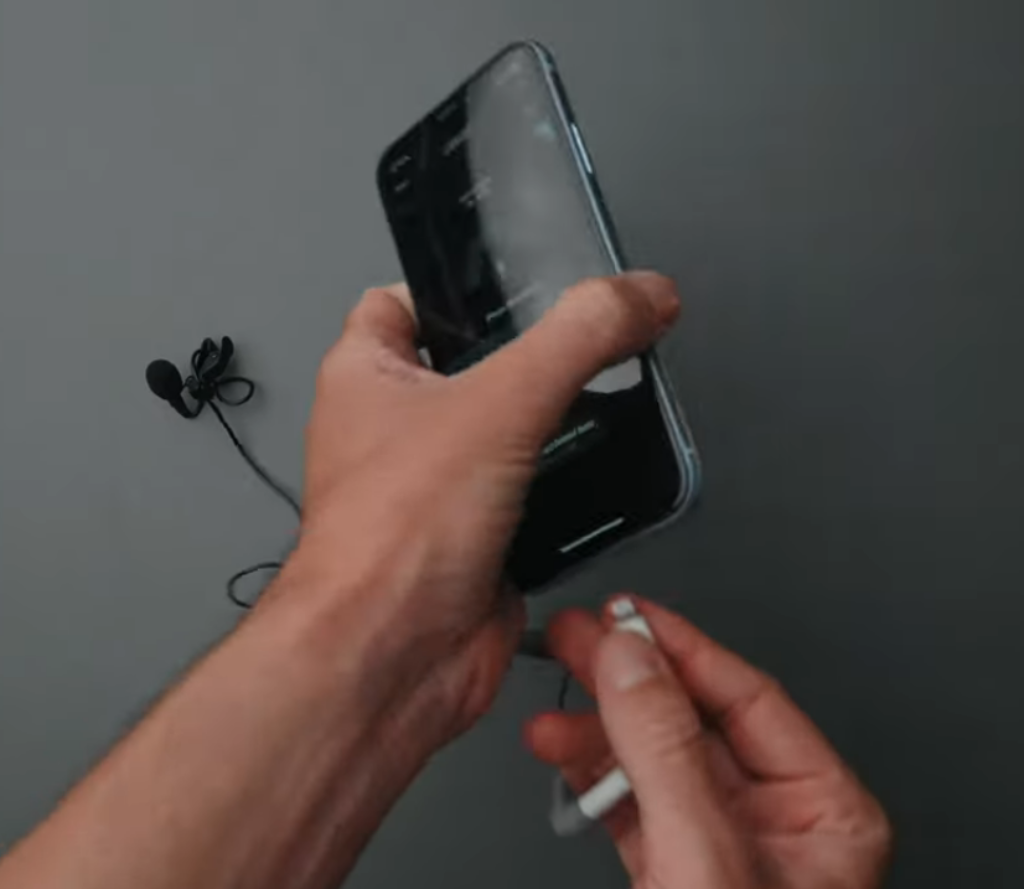
- Step 3: Next, connect the lightning connector to your iPhone 10.
Note: Finding the right connector match for your iPhone is still the first thing to do. So, if your iPhone has a lightning port, you can directly plug the mic into it. If you are using an adapter, connect the mini mic to it and plug it into the port. If you are using a wireless mic, plug the RX into the port with or without an adapter.
3. Grant Permission
After plugging the mini microphone into your iPhone, you may see a prompt on the screen asking for permission for the mic to access your mobile. If you can’t see it, check the notification bar. Once you have found the access request, allow the mic to access your iPhone. This will permit your mic to integrate with your phone for smooth functionality. If you have missed the prompt or accidentally refused permission, go to your iPhone settings. Look for device or app settings related to the microphone and grant access from there.
4. Choose Your Mini Microphone as Your Main Audio Input
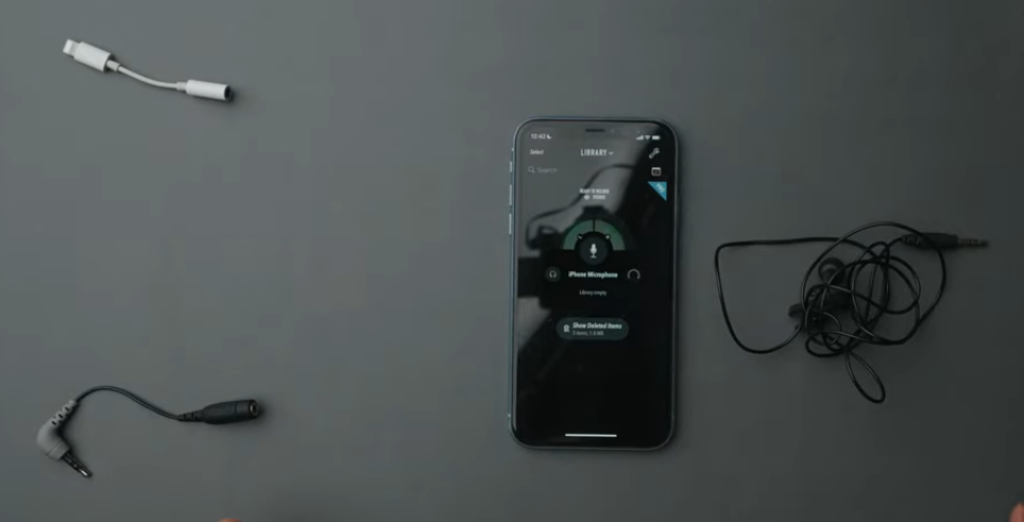
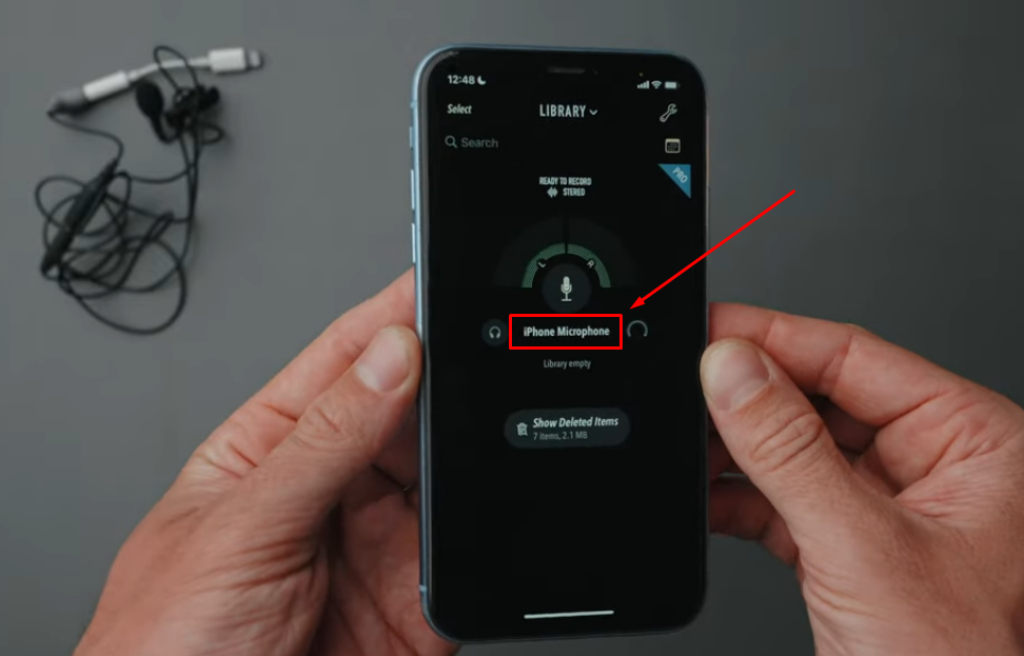
Assuming you have granted permission to the Ferrite Recording Studio, the recording app will automatically detect and use the external mini microphone after connecting it to your iPhone.
For instance, you can see in the image below that before connecting the external mini microphone to Ferrite on the iPhone 10, the app used the internal mic of the iPhone for recording audio.
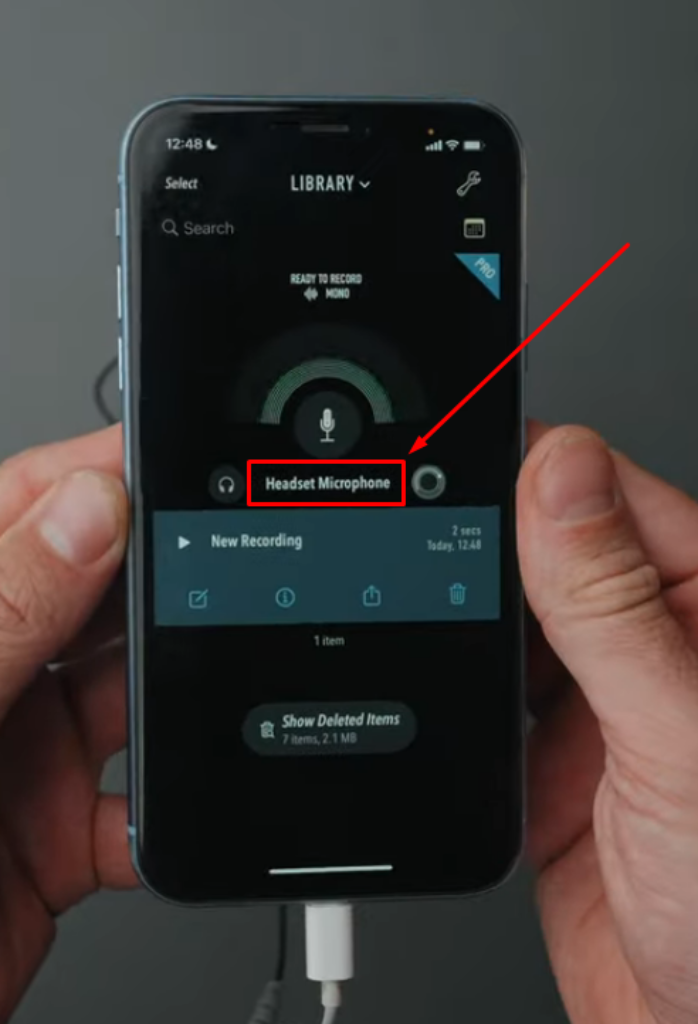
But, right after connecting the external mini mic, the app automatically detected the new device as a ‘Headset Microphone.’
But remember that some audio recording applications on iPhones may not detect the external mic automatically. For such scenarios, make sure the mic is correctly inserted into your phone’s port. Next, launch your audio recording application and go to its settings. Look for the option that lets you choose an audio input that is different from the built-in microphone. If you don’t find any similar option, then it may be possible that the app does not support external mini microphones. That is why it is essential for you to select an app that allows external mini mics.
5. Adjust Settings in Your App
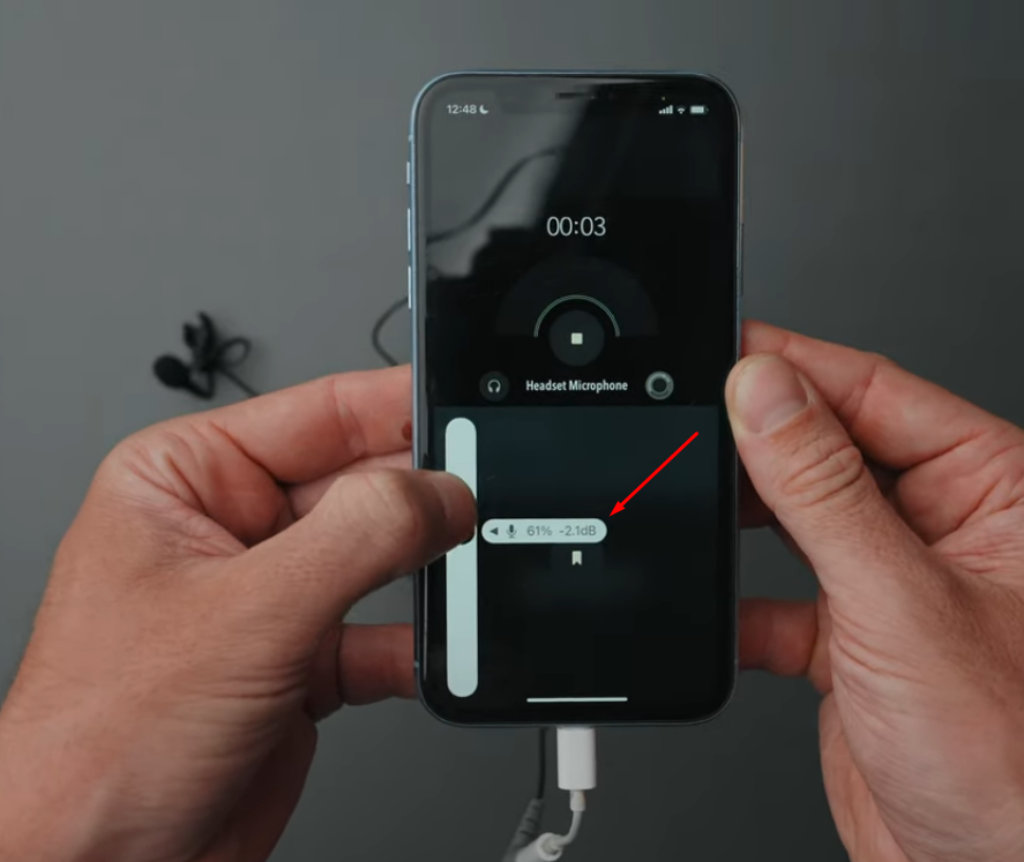
When you use the recording app for the first time, it comes with default audio settings, which may or may not suit your preference. Therefore, it is best to make changes at this stage. To do that, enter your app’s audio/mic settings. Look for gain and volume settings and adjust them accordingly.
One of the best ways to amend these features is to know the type of content you want to record. For instance, if you want to use the mini mic for ASMR audio recording, you can set the gain and volume levels high. Some applications have a slider for making adjustments, while others may ask you to enter numeric values.
For example, when you record audio with Ferrite Recording Studio, you will see a ‘Gain’ option each time you record a new track. You can adjust it as per your requirements using the slider.
6. Test Your Mini Microphone
If you have followed all the previous suggestions carefully, it is time to test your mini microphone. Start by recording a short audio clip to check the sound quality. Playback your recording and focus on issues like background noise, low volume, or distortion. You may need to readjust your mic’s settings and position to correct problems.
If you are using a wireless microphone, walk away from your iPhone while audio recording. Check the point at which the sound quality begins to degrade. Doing so will help you understand your mic’s actual range to record clear audio.
7. Start Recording
Prepare for the first recording after the mic is checked and the audio quality is tested. Hit the record button on your app to start the session. Keep the microphone at an optimal distance from your mouth and speak clearly. Do not get conscious of the mic, and stay relaxed. While recording, keep an eye on the recording levels to ensure the sound is not distorted.
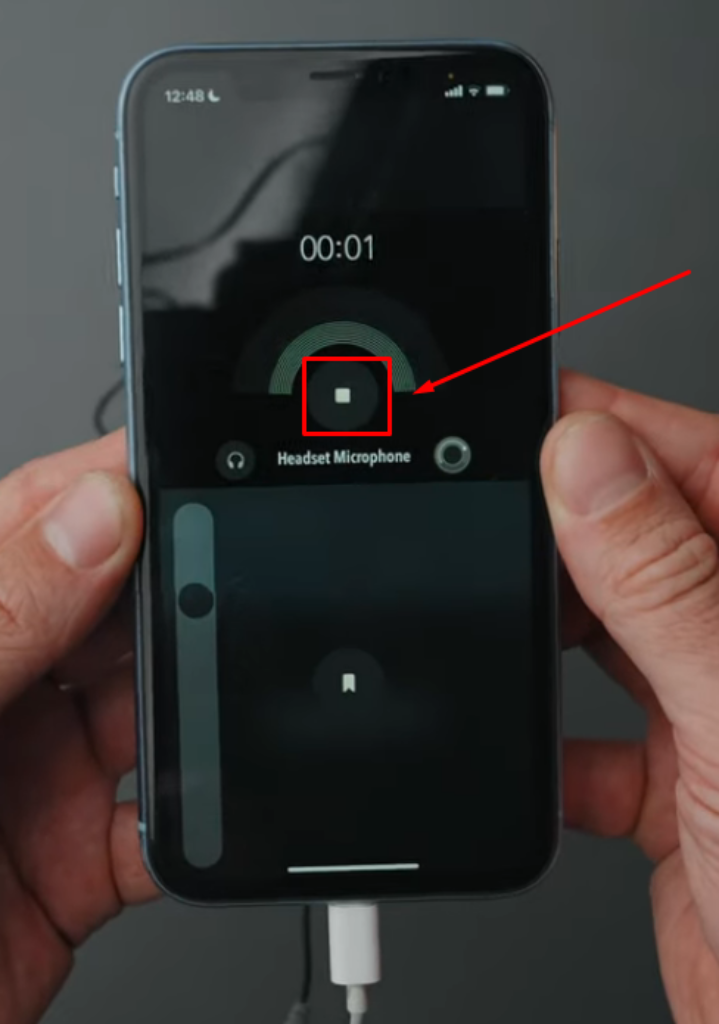
On Ferrite Recording Studio, you can begin recording by tapping the ‘Microphone’ icon.
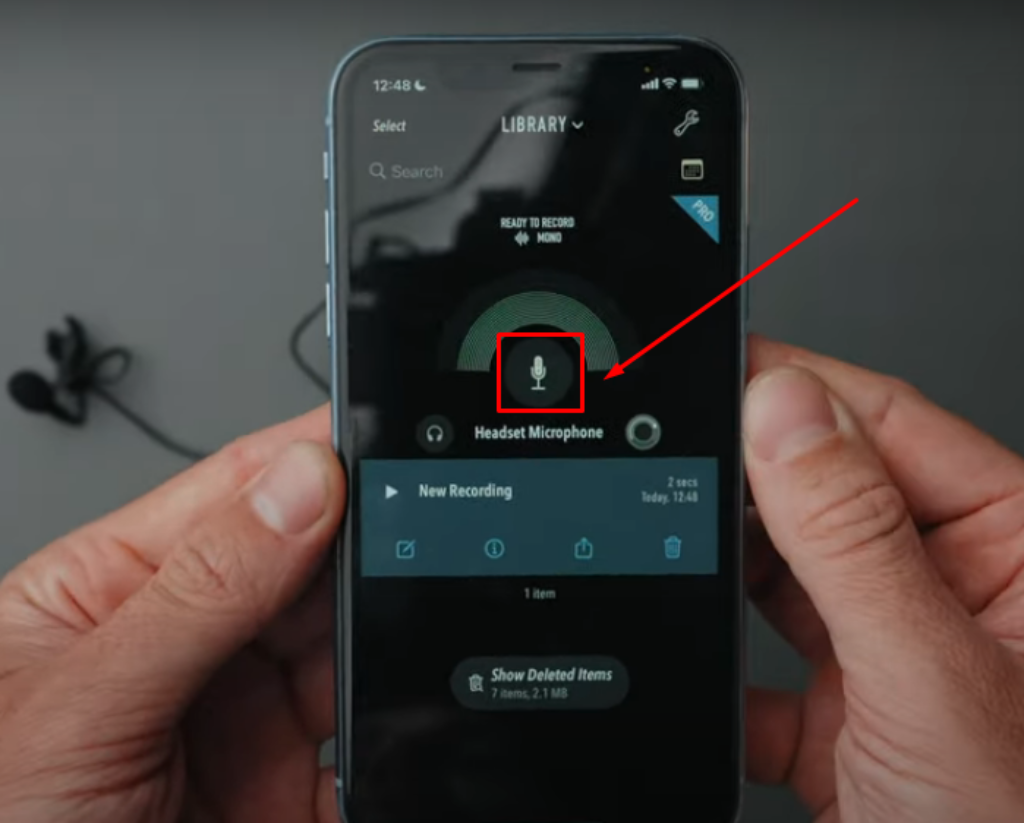
Stop recording by tapping the ‘Stop’ icon (it appears in the same place as the ‘Microphone’ icon).
8. Save and Edit Your Recording
Lastly, save your recording by tapping the stop button and then save it. Depending on the app, you may be prompted to rename the recording. Playback the audio, and feel free to edit the track using any audio editing application of your choice.
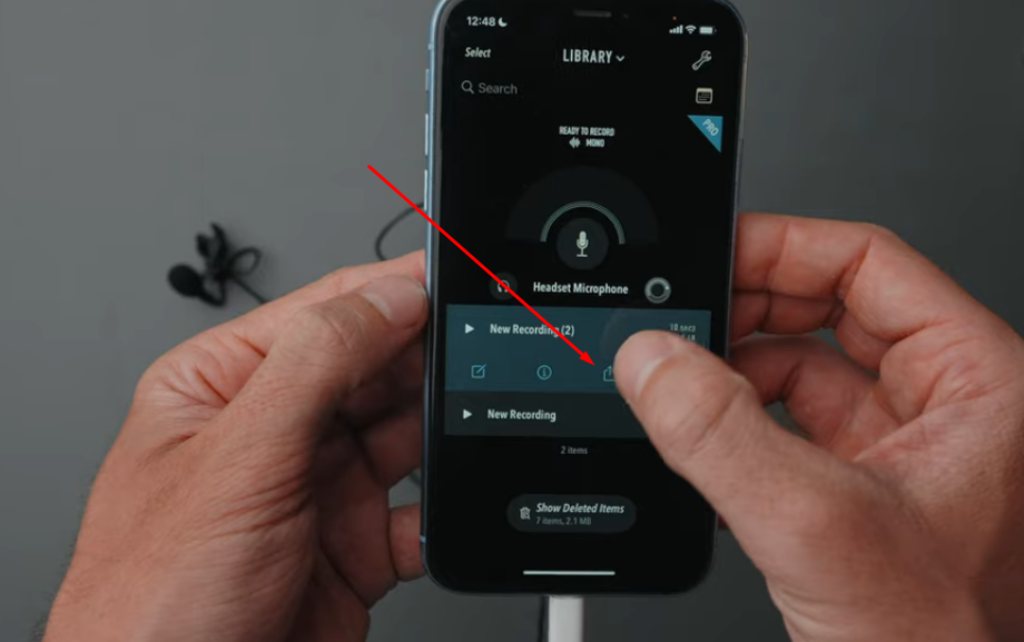
- Step 1: To save and share the file on Ferrite, tap on the recorded file. Click the ‘Share’ icon.
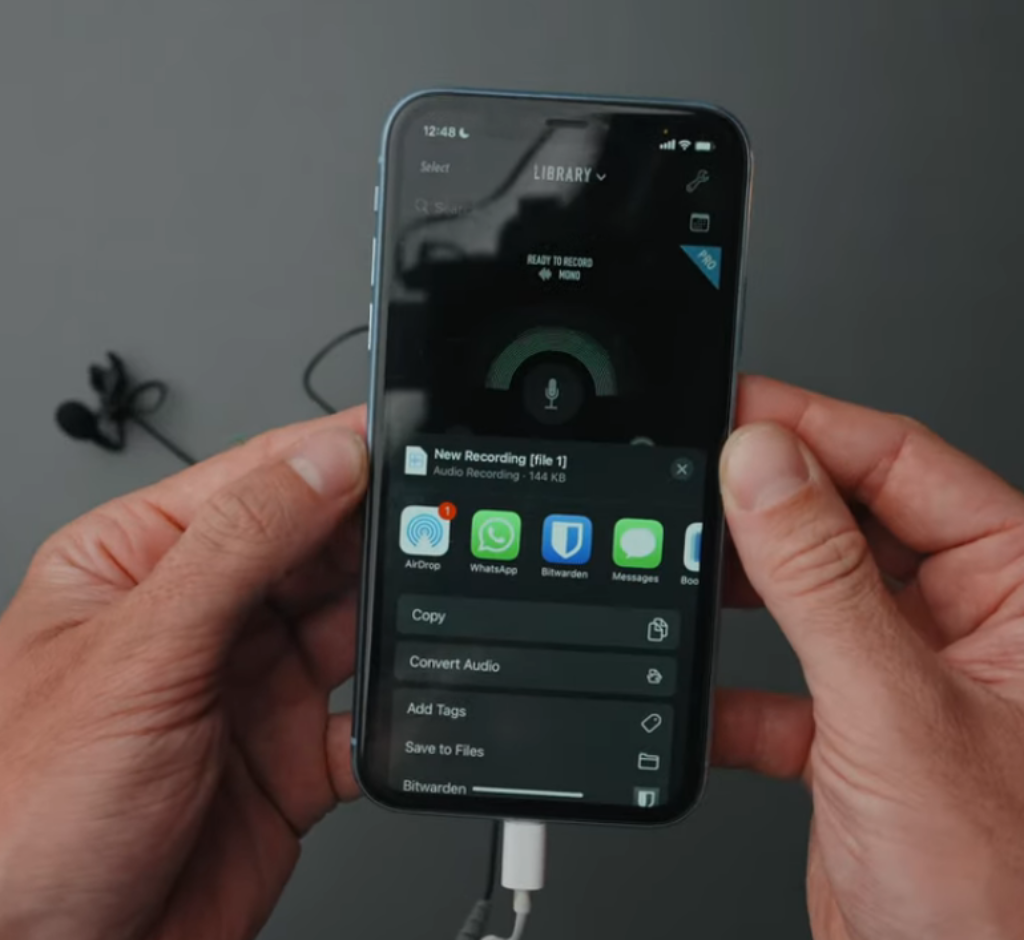
- Step 2: You will see a list of options to share your recorded audio, such as AirDrop, WhatsApp, and more.
But if you want to edit the audio before sharing it.
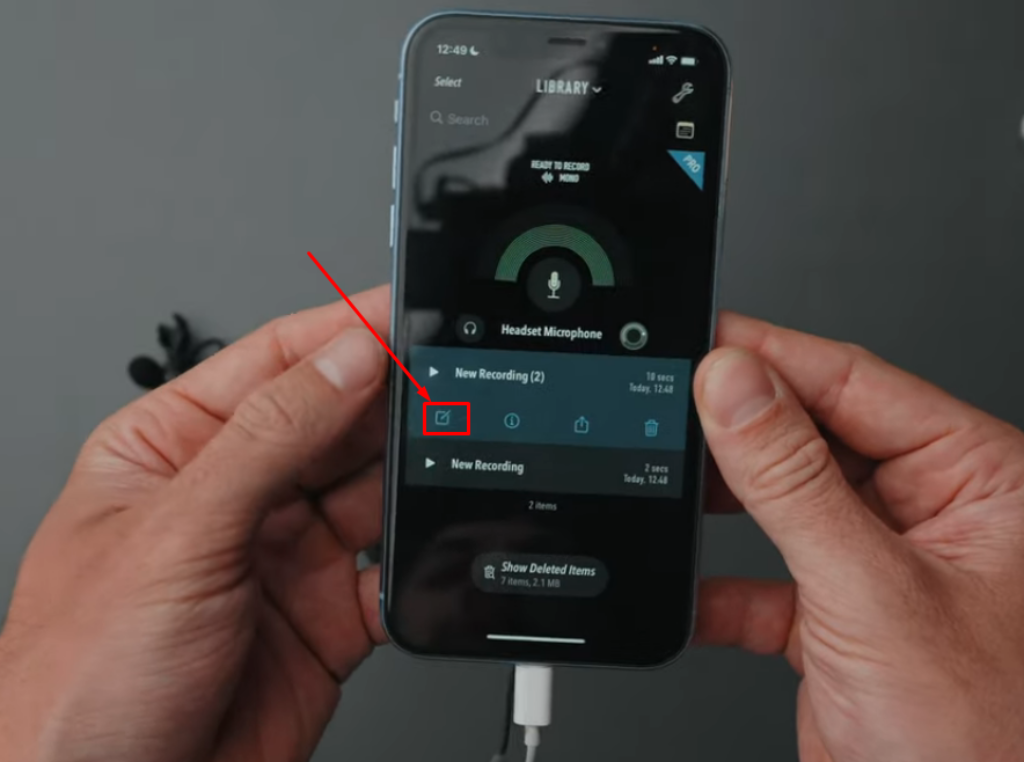
- Step 1: Tap on the recorded track in the app.
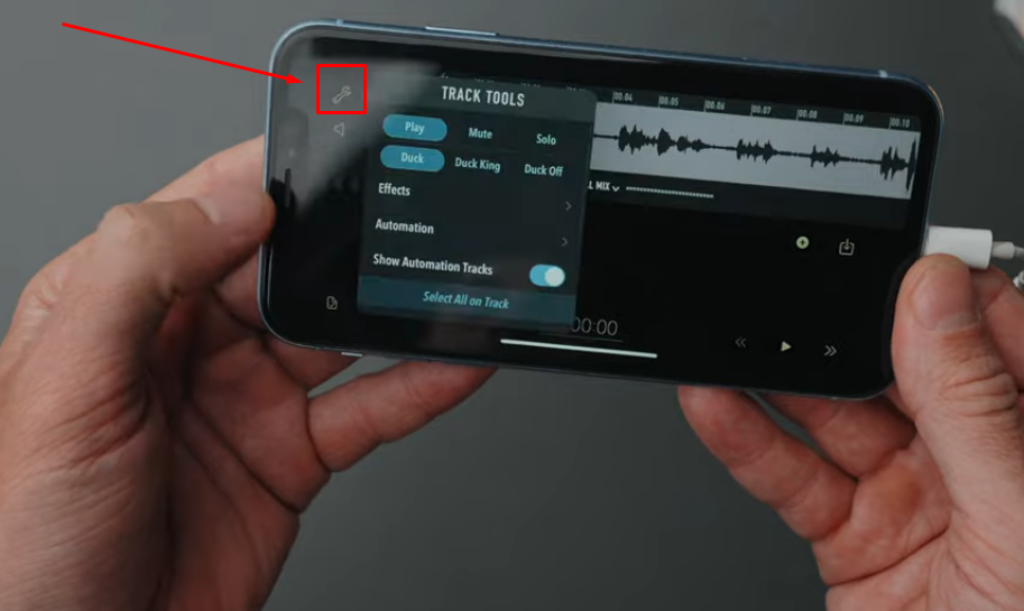
- Step 2: Click on the ‘Edit’ icon.
- Step 3: Tap on the ‘Wrench’ icon to see the list of editing tools, such as filters, effects, and more.
What are the Best Mini Microphones Compatible with iPhones?
Here are the top 3 mini microphones that record high-quality audio on your iPhone.
1. Hollyland Lark M2
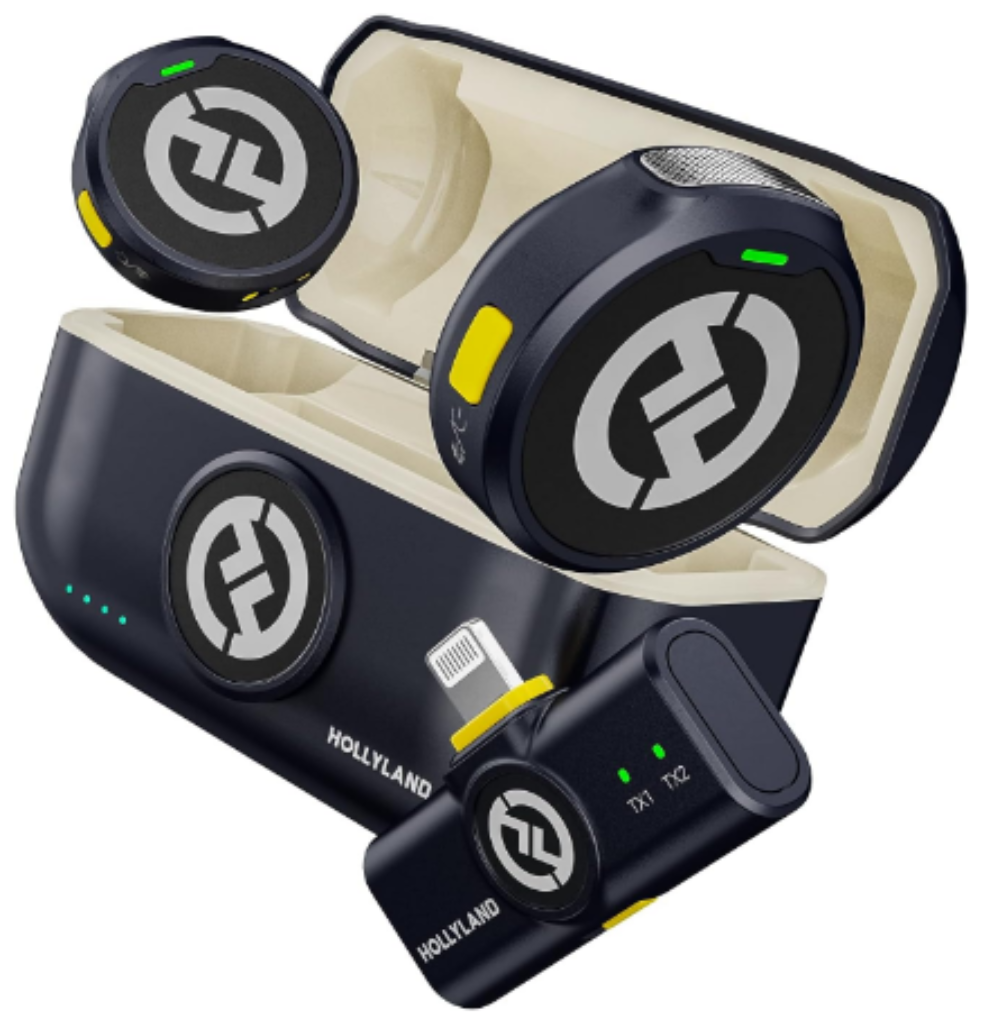
The Hollyland Lark M2 is an all-in-one 2.4GHz wireless solution for iPhone audio recording. It is a kit of 2x transmitters and 1x receiver. This microphone is available in both lightning and USB-C connectors. This lets you connect it to almost all iPhone models, including the iPhone 15 series.
The Hollyland Lark M2 has several notable features, including Environmental Noise Cancellation, that further ensure crystal-clear recordings. It allows you to record up to 10 hours on a single charge. Besides, it covers a wide wireless transmission range of up to 1000ft. Additionally, both TX and RX units of this omnidirectional mini microphone have less than 2-inch dimensions (L x W x H).
2. Saramonic SmartMic 5 Di
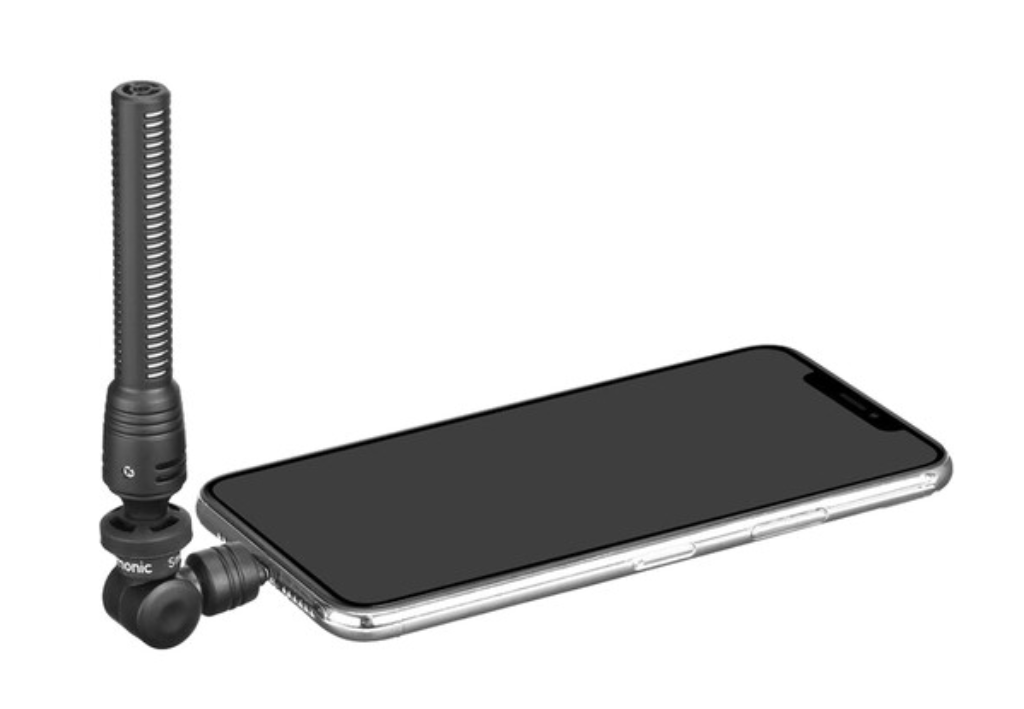
The Saramonic SmartMic 5 Di is a mini shotgun-styled microphone with a lightning port. It is neither a wired nor a wireless mic. Instead, the connector is embedded in its design, allowing you to connect the microphone directly to your iPhone (plug-and-play).
This microphone can be used for a variety of applications, including vlogging. Due to its portable and lightweight design, you can carry it anywhere hassle-free. This mini microphone for iPhone also has an integrated shock mount that mitigates handling noises. However, it is a unidirectional microphone with a mono sound field. You can use it with iPhone 5 to iPhone 14 Pro Max.
3. GALVANOX
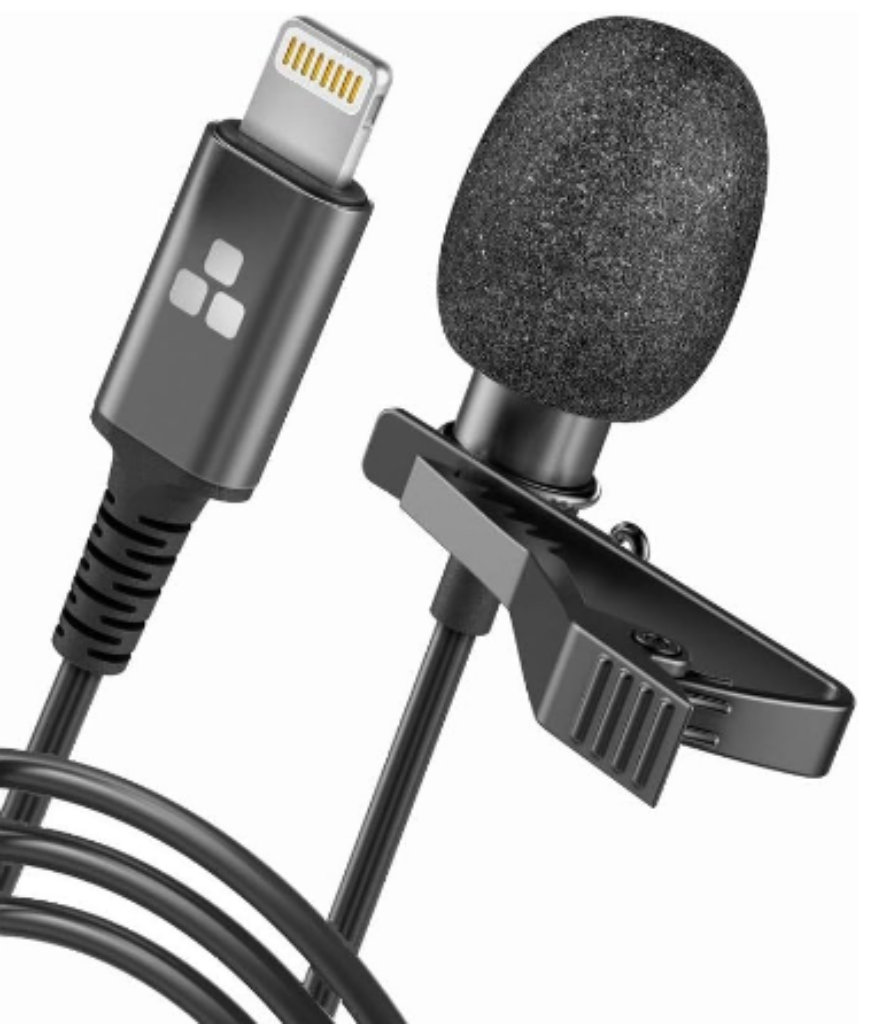
GALVANOX is a wired microphone with two connector options – USB-C and lightning, making it compatible with iPhone 5 to iPhone 15 (all series) models. It is an omnidirectional microphone with a clip-on mechanism that weighs around 17.8 grams. It is a user-friendly mic with an easy setup. While the audio quality is not professional, it can still be a good option for beginners.
Conclusion
The usability of a mini microphone with an iPhone depends on several factors, such as the microphone type. When it comes to miniature mics, you can pick from wired, wireless, and plug-and-play microphones that directly connect to your iPhone port without cable or Bluetooth connectivity. To ensure the mini mic will work with your iPhone model, choose an MFi-certified microphone. Make sure it is compatible with your iOS version.
After connecting the mic, allow it to access your phone’s settings so you can select it as your primary mic from the settings. Once done, test, record, and save your audio for the editing process. While you can go for any compatible microphone with an iPhone, the Hollyland Lark M2 and Saramonic SmartMic 5 Di are still the most usable mics due to their effortless connectivity, advanced features, and ease of use.
How to Use Mini Microphone with iPhone – Frequently Asked Questions
Q1. Is it possible to use a mini microphone with an iPhone without a headphone jack?
Yes, it is possible to use a mini microphone with your iPhone that does not have a headphone jack. There are various adapters like USB-C to 3.5mm or lightning to 3.5mm headphone adapters that let you connect microphones with iPhone models through the USB-C or lightning ports. Moreover, if you choose a wireless mini microphone, you will not need a headphone jack to use it. You can connect the mic’s receiver to your iPhone’s port, pair it with the transmitter, and you’re ready.
Q2. What adapter do I need to connect a mini microphone to an iPhone?
To connect your mini microphone to iPhones, you will require a Tip-Ring-Ring-Sleeve (TRRS) to lightning adapter. It will ensure connection by turning the microphone’s TRS connector into the lightning port. You should also know that TRRS permits both audio output and input. However, make sure you select an adapter that has a Made for iPhone (MFi) certification. Such adapters are tested and certified to be used with your iPhone safely. Also, they work better than non-MFi-certified adapters in terms of audio quality.
Q3. Can I connect a mini microphone to my iPhone wirelessly?
Yes, you can easily connect a mini microphone to your iPhone wirelessly by using a device that works on 2.4GHz digital wireless or Bluetooth technologies. However, if you use the Bluetooth wireless microphone, ensure your iPhone’s Bluetooth is active. To do that, turn on the Bluetooth on your phone and pair it with your microphone. Once the mic is detected, choose the microphone from your Bluetooth settings to make a wireless connection.
Contrarily, if it’s a mini microphone kit (with a transmitter and receiver), you will have to attach the receiver to your iPhone’s port and turn it to pair with the transmitter unit via Bluetooth or 2.4GHz.
Q4. Do I need a special app to use a mini microphone with my iPhone?
The Voice Memo app on your iPhone lets you use an external mini microphone. However, it has to be compatible with your iPhone model in order to work. According to the Apple Support forum, the external microphone can also record audio in stereo mode, whereas the built-in only records audio in mono mode. On the other hand, some microphones are not detected by the Voice Memo app. Therefore, you might need to download a third-party audio recording application to record sound using that particular mini microphone.
Q5. How can I improve the sound quality when using a mini microphone with my iPhone?
Make sure the mini microphone is compatible with the iPhone model you have. Before plugging in the mic, gently clean the lightning or USB-C port of your phone to remove any dirt, as it can affect smooth connectivity. Also, if you are using an adapter, choose the one with MFi certification. Also, when recording audio, experiment with different audio adjustment settings. And if you are recording on a windy day, use windshields to reduce air noise. Besides, activate your mini mic’s noise-canceling feature if it has one.
Q6. Are there any limitations when recording with a mini microphone on an iPhone?
There can be some limitations when capturing audio on an iPhone using a mini microphone. Some microphones may give you compatibility issues when connecting to specific iOS versions. Likewise, in some cases, mini microphones are advertised as “compatible” with different iPhone models, but in reality, they don’t work.
It is also observed that the built-in iPhone mic can outperform several mini microphones in user-friendliness and audio quality. Also, due to the tiny size, it is possible that some mini microphones may not be able to capture ambient sounds. That is why it is always suggested that you look for an MFi-certified device.
Q7. How can I troubleshoot connectivity issues with a mini microphone on my iPhone?
If you are using a wireless mini microphone, try re-pairing the TX and RX units. If the problem still exists, restart the microphone and reconnect. Sometimes, when you don’t update the mic’s firmware, it causes connectivity problems. So, keep your mic and iPhone up-to-date with the latest software.
Q8. Can I use a mini microphone for video recording on my iPhone?
Yes, you can use the external mini microphone to capture audio when recording videos with your iPhone. Moreover, you can download video recording apps from the Apple Store that support external mics. Third-party video recording apps like Mavic, Filmic Pro, and MoviePro support external microphones.
Q9. What should I do if my iPhone doesn’t recognize the mini microphone?
If your iPhone is not detecting the mini mic, make sure the mic is securely connected to the port. If the problem persists, check the same mini microphone on another iPhone to find out if the problem is with your iPhone’s hardware. Also, update the iOS to the most recent version. You should also restart your iPhone and try to connect the mic again. If the issue continues, contact the mini microphone manufacturer or the Apple Support/service center.
Q10. How do I connect a mini microphone to an iPhone for podcasting?
Connect the mini microphone to your iPhone port. Once the mic is connected, use a third-party app to record audio and video. Then, AirDrop or share the file with your computer or tablet for post-production. Edit and use filters on your audio to polish the quality.
Q11. Is it possible to connect multiple mini microphones to an iPhone?
You can connect two mini microphones simultaneously to your iPhone if they are wireless mics with 2x transmitters and 1x receiver like the Hollyland Lark Max or Lark M2. The process is quite simple. First, connect the receiver to your iPhone and pair both transmitters. Once paired, use your preferred audio recording app to record multiple sound sources at the same time. Contrarily, if you have different wireless mic brands, you will need to connect both mics with an audio interface. You may also need to purchase TRRS to connect mics to lightning cables.
Q12. How can I ensure my mini microphone is compatible with the latest iPhone model?
Since the latest iPhone model is iPhone 15 (series), you should check the specifications for the connector. If the microphone has a USB-C connector, supports the latest iOS version, and, most importantly, has an MFi certification, it means the mic will work with your iPhone.
![How to Use Mini Microphone with iPhone? [Quick Tips]](https://micwizard.com/wp-content/uploads/thumbs_dir/image-8-qkpnkhtmj8hl1vb0rl4bhif5732pp3ykr2pbn33lto.png)
![How to Use Mini Microphone with iPhone? [Quick Tips]](https://micwizard.com/wp-content/uploads/thumbs_dir/image-35-qkpnv5brzn2kmrtyk6w3qtn7kakgxm927svffzazb0.png)

![How to Use a Mini Microphone from Temu [Step by Step]](https://micwizard.com/wp-content/uploads/2024/02/image-67-336x220.jpeg)
![How to Use Mini Microphone From Target? [Step by Step]](https://micwizard.com/wp-content/uploads/2024/02/image-55-336x220.jpeg)
